[JAVA] 자바로 이클립스에서 엑셀(.xlsx) 파일 쓰기
2020. 12. 12. 16:06
반응형
1. poi 라이브러리 다운로드
archive.apache.org/dist/poi/release/bin/
Index of /dist/poi/release/bin
archive.apache.org
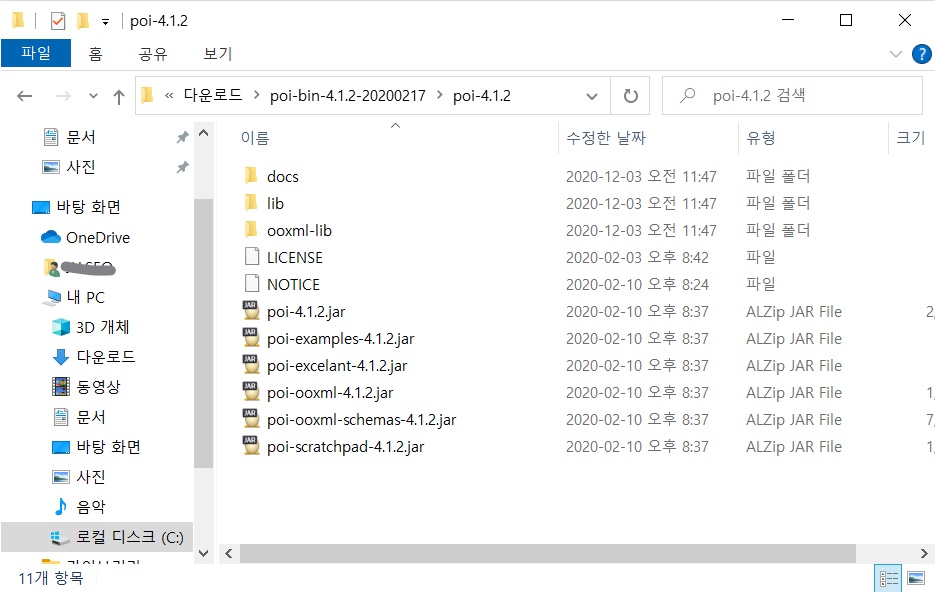
현재 기준으로 최신 .zip 파일을 다운로드하고 압축을 풀어주세요.

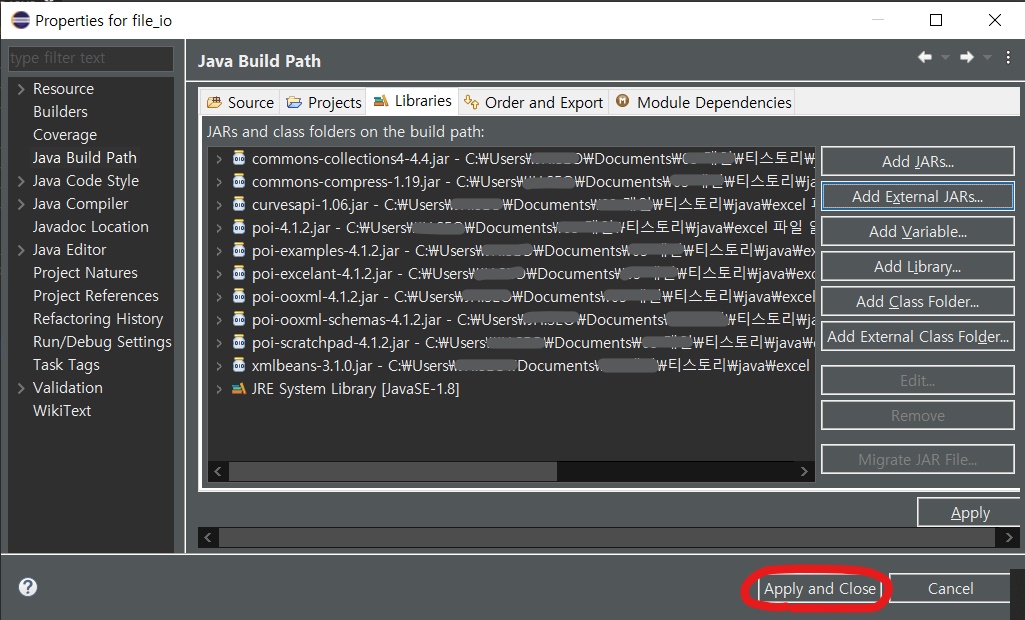
2. eclipse 프로젝트에 외부 라이브러리 추가
다운받은 라이브러리를 해당 프로젝트에 추가해 줍니다.
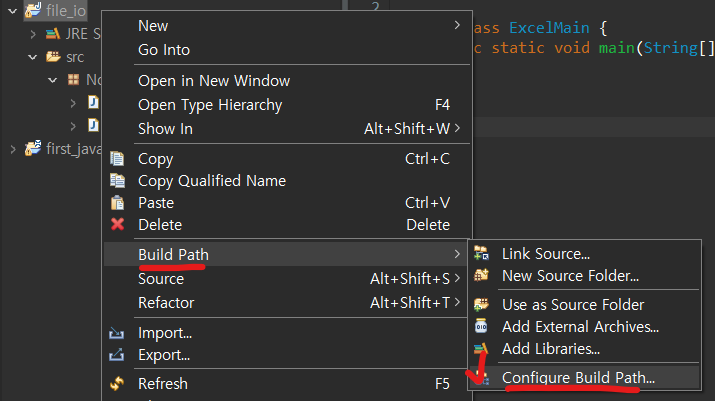
프로젝트 우클릭 > Build Path > Configure Build Path...
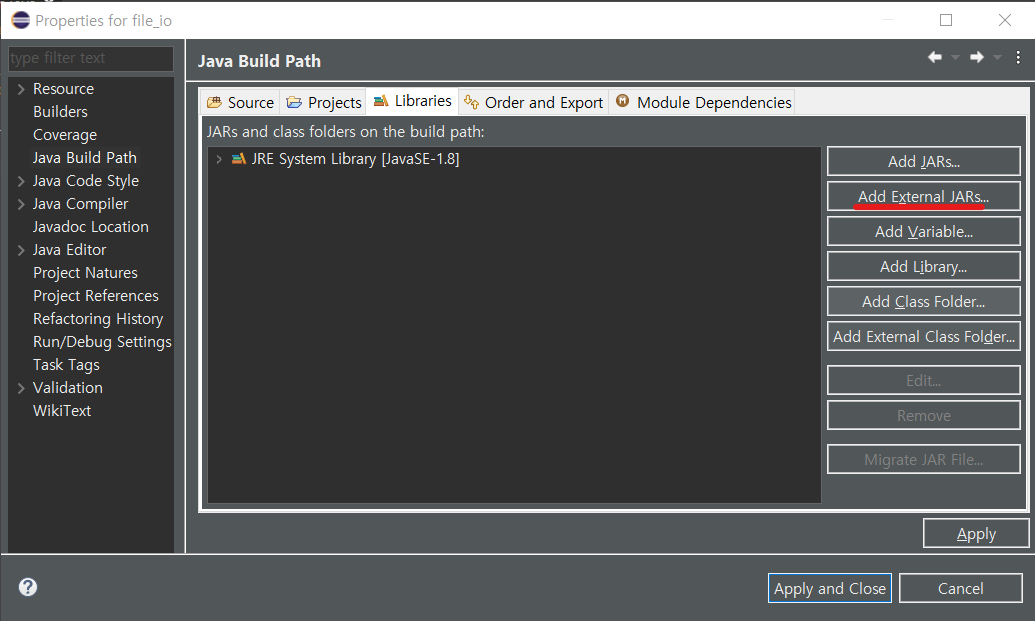
Add External JARs... 클릭
프로젝트 안에 jar 파일들을 넣으셨다면 Add JARs.. 로 추가해 주세요.
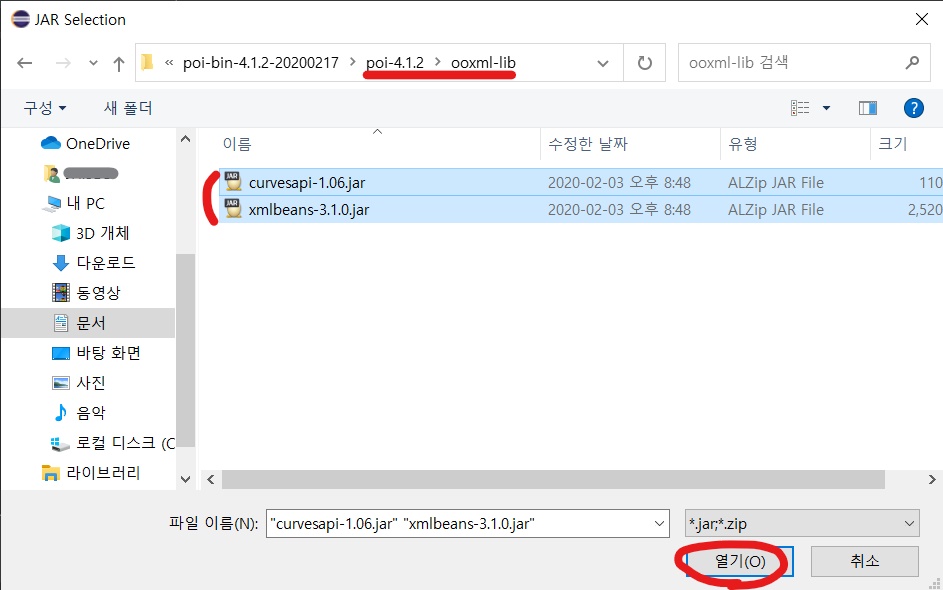
추가해 주실 jar는 아래 3가지 위치에 있습니다.
압축을 푼 위치에 있는 아래 파일을들 선택해서 넣어줍니다.
- poi-*.jar
- lib/commons-collections4-4.4.jar
- lib/commons-compress-1.19.jar
- ppxml-lib/*.jar


Apply and Close 클릭
3. 코드 작성
작성할 class를 만들고 아래 코드를 작성합니다.
package None;

import java.io.File;
import java.io.FileOutputStream;

import org.apache.poi.xssf.usermodel.XSSFCell;
import org.apache.poi.xssf.usermodel.XSSFRow;
import org.apache.poi.xssf.usermodel.XSSFSheet;
import org.apache.poi.xssf.usermodel.XSSFWorkbook;

public class ExcelMain {
	public static void main(String[] args) {
		excelWriter("C:/projects/examples/excel_demo.xlsx");
	}

	/**
	 * 엑셀파일 쓰기 예제 메소드
	 *
	 * @param filePath
	 */
	static void excelWriter(String filePath) {
		XSSFWorkbook xworkbook = null;
		XSSFSheet xSheet = null;
		XSSFRow xRow = null;
		XSSFCell xCell = null;


		/* 3행 3열 예시 */
		try {
			xworkbook = new XSSFWorkbook();
			xSheet = xworkbook.createSheet("sheet1");

			xRow = xSheet.createRow(0);
			xCell = xRow.createCell(0);
			xCell.setCellValue("번호");
			xCell = xRow.createCell(1);
			xCell.setCellValue("이름");
			xCell = xRow.createCell(2);
			xCell.setCellValue("생일");

			xRow = xSheet.createRow(1);
			xCell = xRow.createCell(0);
			xCell.setCellValue(1);
			xCell = xRow.createCell(1);
			xCell.setCellValue("영희");
			xCell = xRow.createCell(2);
			xCell.setCellValue("1993-11-30");

			xRow = xSheet.createRow(2);
			xCell = xRow.createCell(0);
			xCell.setCellValue(2);
			xCell = xRow.createCell(1);
			xCell.setCellValue("철수");
			xCell = xRow.createCell(2);
			xCell.setCellValue("1991-01-03");

			File file = new File(filePath);
			FileOutputStream fos = new FileOutputStream(file);
			xworkbook.write(fos);

			if (fos != null)
				fos.close();
		} catch (Exception e) {
			e.printStackTrace();
		}
	}
}
코드 별로 의미를 간단히 보면,
XSSFSheet xSheet = 엑셀에서 하나의 시트가 됩니다.
XSSFRow xRow = 행
XSSFCell xCell = 열
- 시트를 생성해 줍니다.
xSheet = xworkbook.createSheet("sheet1");
- 0번째 행을 만들고
xRow = xSheet.createRow(0);
- 0번째 행에 해당하는 0번째 열을 만듭니다
xCell = xRow.createCell(0);
- 0,0 에 입력할 내용을 입력합니다.
xCell.setCellValue("번호");
입력할 데이터가 Map, List 등에 담겨있다면,
반복문을 이용하여 데이터를 넣으시면 됩니다.
도움이 되셨다면 공감 클릭 부탁드립니다 :)
반응형
'Java' 카테고리의 다른 글
| [Launch4j] 자바 exe 파일 생성시 메모리 설정하는 방법 (0) | 2021.02.16 |
|---|---|
| [JAVA] 자바로 이클립스에서 CSV 파일 쓰기 (줄바꿈 입력 방법 포함) (0) | 2020.12.14 |
| 자바에서 원하는 주소로 웹 브라우저 실행하기 (0) | 2020.11.28 |
| [JavaFX]Scene Builder 설치 및 윈도우 프로그램 개발 방법 (0) | 2020.11.26 |
| [JavaFX]이클립스에 설치 & 시작하기 (import javafx 빨간줄 없애기) (2) | 2020.11.23 |


